Quickstart Guide – Bill Payment
Accessing utility data using the Urjanet platform is a 2-step process.1) Create a link to the utility provider using the account login credentials 2) Download utility data from Urjanet Console.
Step 1: Connect an account
Credentials can be linked in the Urjanet system in 2 different ways. 1 way is through Urjanet Connect, a lightweight web tool that is designed to just take in credentials in order to create provider connections. The other way is through Urjanet Console, an administrative dashboard that allows you to do things like accessing your data and configuring your organization’s settings.
Connect
Urjanet Connect is a hosted web form that handles provider search, form validation, and submission of data requests on behalf of your customers. You can customize many of Connect’s features – including links to your Terms of Use & Privacy Policy as well as the parameters of incoming data requests in the Urjanet Console.
To get started, embed the Connect URL into an email or web page. For an internal test, connect one of your personal utility accounts, or send the link directly to coworkers.
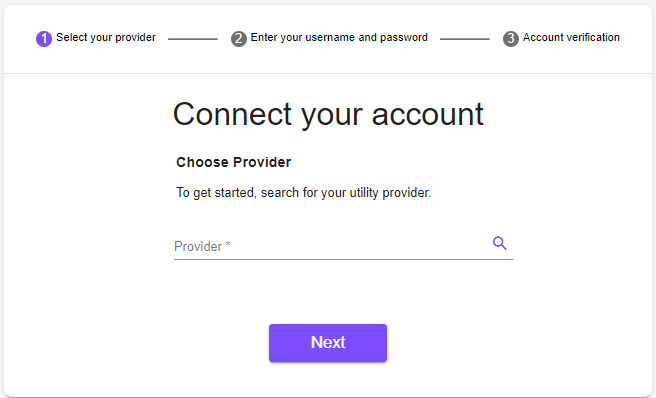
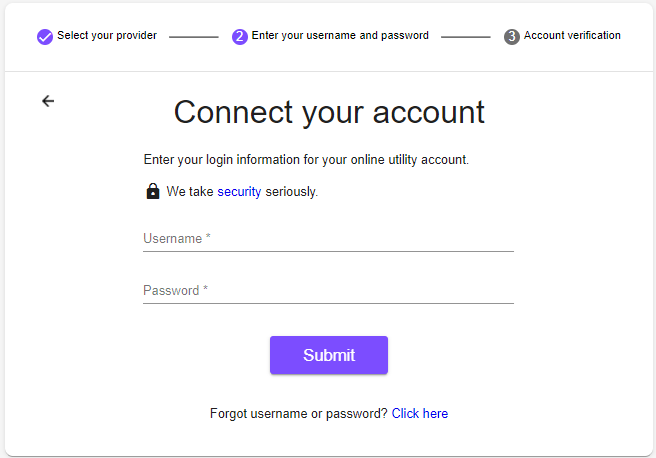
Connecting an account requires a user to select their Utility Provider, and enter their username & password
Select a utility provider
Enter username & password
Console
As was mentioned earlier, Urjanet Console is an administrative dashboard that allows the user to access the collected data and edit settings. You can link accounts in Console in the same manner as you can with Connect, however, because it is an administrative tool, there are a few extra feature/workflow enhancements.
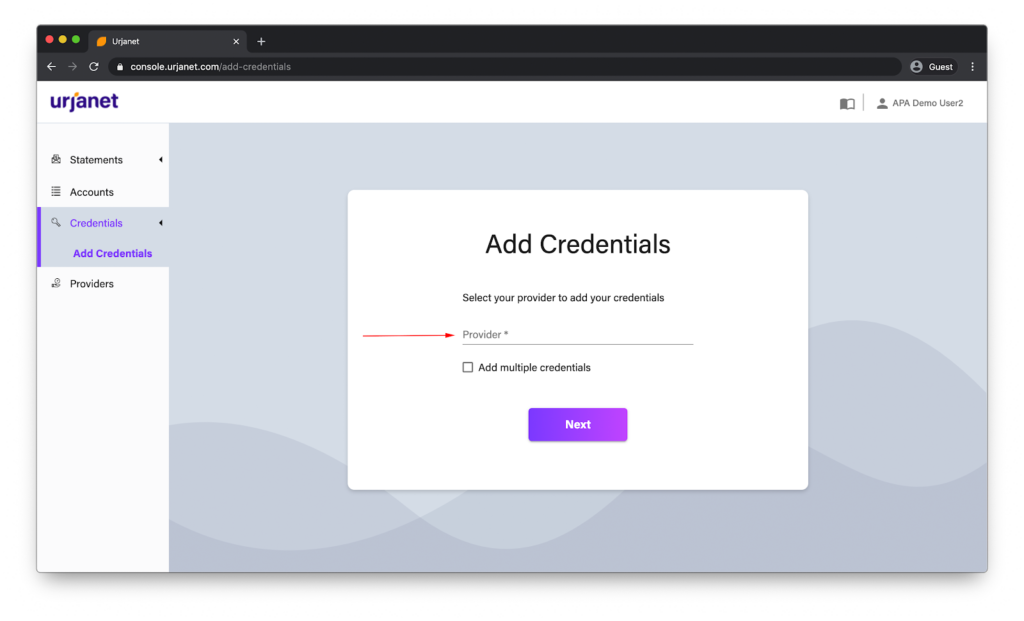
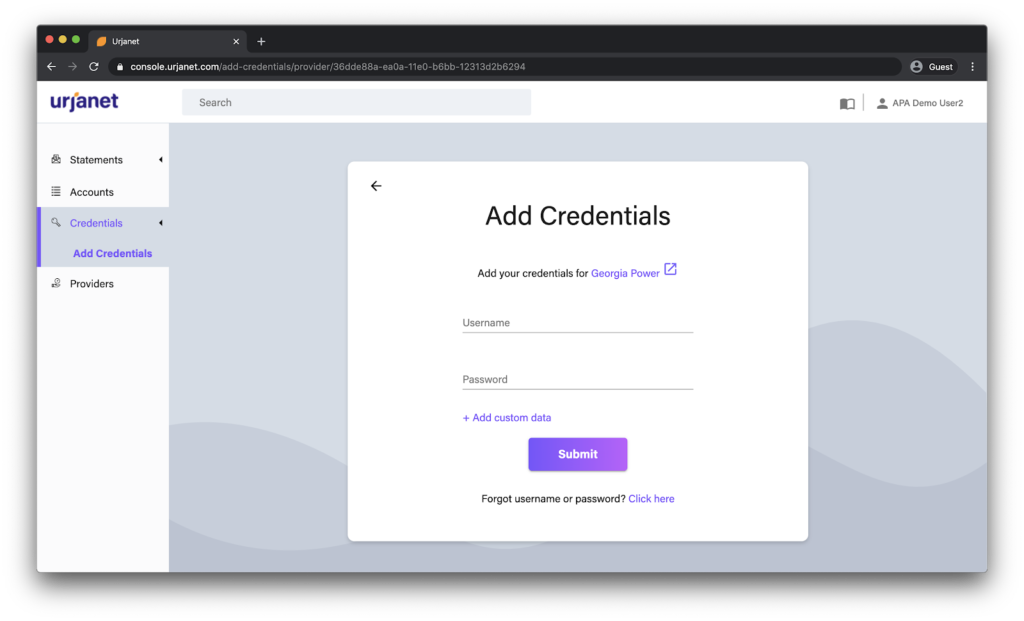
To add a new credential through Connect – use the Credentials Module and click “Add Credentials”. When a credential is added to the system, Urjanet will immediately go and acquire all accounts behind that credential. This can take time depending on the number of accounts behind the credential.
Select a utility provider
To get started, enter the name of a utility provider that you’d like to connect. Only providers that meet the data requirements for the solution are available. If you wish to add multiple credentials for a provider. You can do so by checking the “Add multiple credentials” box.
Enter username & password
Enter the credentials for the provider. Optionally, you can also add custom data to the request. You have the ability to add a correlationID as well as 10 custom data fields. More details about custom data further down in this document.
Step 2: Accessing Utility Data
Once a data request is complete, you can view its utility data in the 3 data modules – Credentials, Accounts, and Statements.
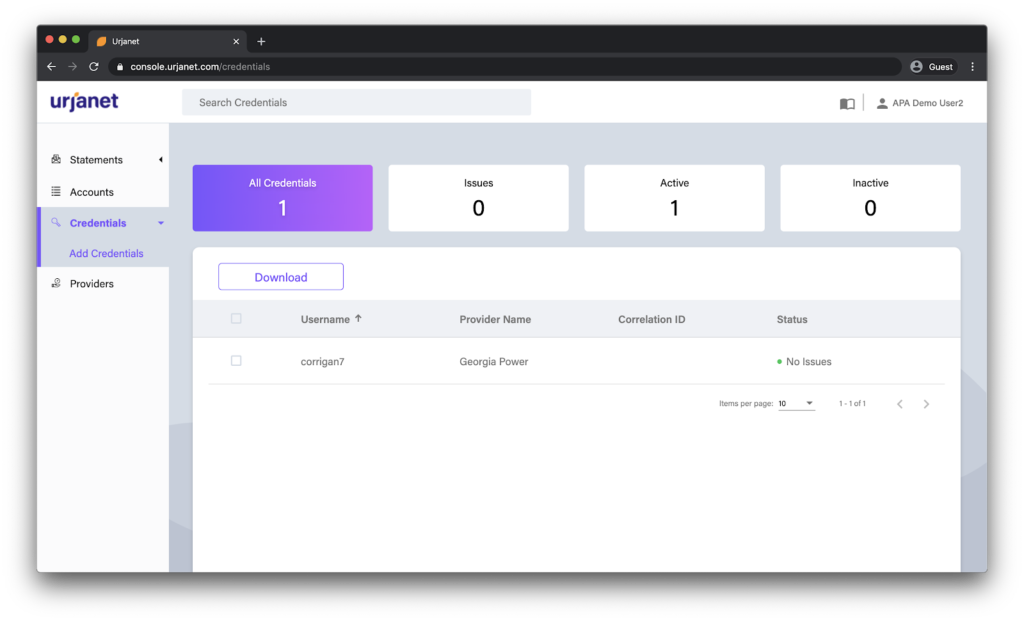
Credentials & Details
On the Credentials page, you can see a list of all the credentials in the system. Across the top of the page are quick filters that allow you to sort by status.
- Issues – This filter shows credentials that have a Login Failure, Blocked, No accounts are found, or bills are unavailable. Check these credentials to see if any action needs to be taken to allow Urjanet to continue to get data.
- Active – This filter shows all credentials that Urjanet is actively monitoring for new invoices
- Inactive – This filter shows all credentials that Urjanet is no longer actively monitoring for new invoices
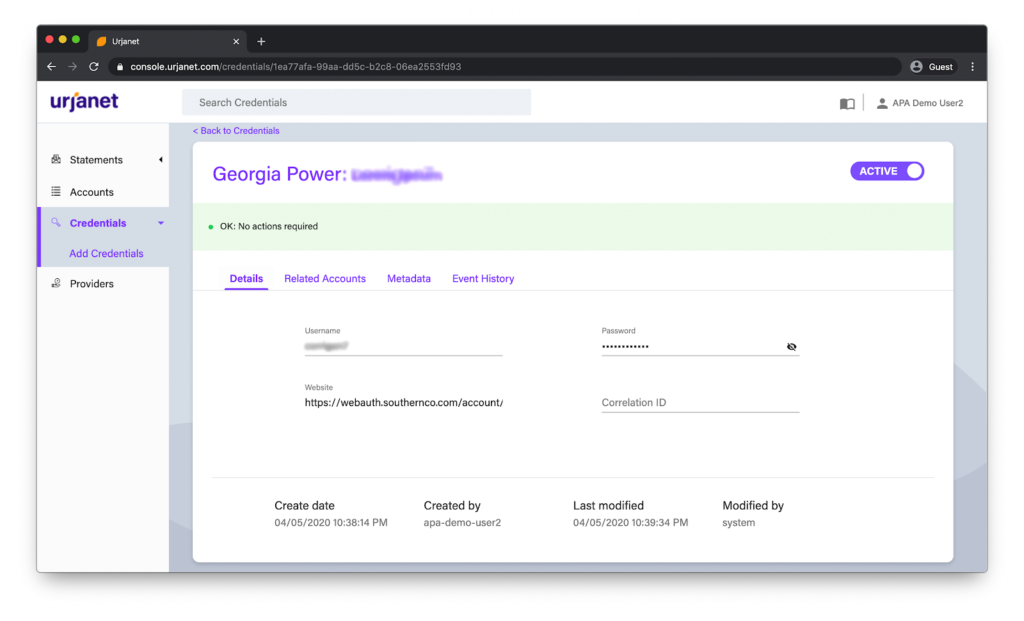
When you click on a specific credential, the details are displayed. The details page shows you everything you need to know about the credential. You can also click on the Related Accounts tab to see all accounts that are associated with this credential.
Accounts & Details
On the Accounts page, you can see filters for different account statuses. Accounts will appear here after the Urjanet platform has been able to navigate and acquire utility invoices and has parsed data from them.
- New: These accounts were recently discovered. you should review this list and deactivate any unnecessary accounts.
- Accounts that have been recently extracted but not yet explicitly Subscribed. If you don’t Unsubscribe these accounts, they move automatically to Subscribed after 30 days.
- Old: No new bill has been posted in >45 days. The user should review and deactivate any inactive accounts.
- Subscribed: All is working and accounts are up-to-date
- Unsubscribed: Unsubscribed Accounts. For these accounts, bills are not accessible and no notifications will be sent.

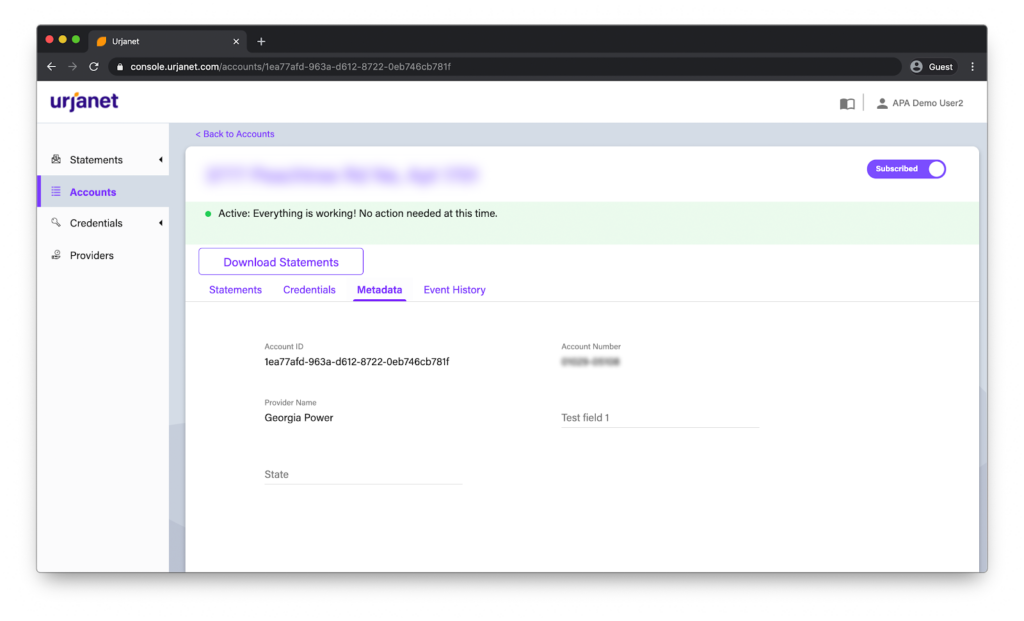
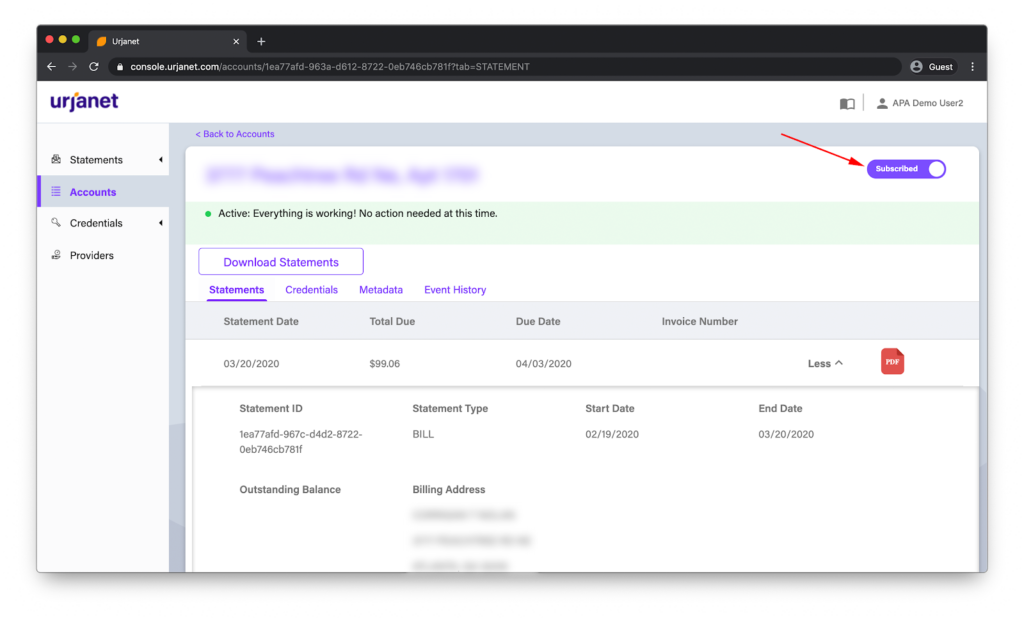
When you click on a specific account, the details page is displayed. Here you can see all the metadata about the account, the associated credential, event history as well as the Statement data.
On the Statements tab, you can view the data that Urjanet has parsed off of the utility invoice.
Note: Urjanet Console shows a subset of the data that is collected.
From here you may download statements and a CSV file will be downloaded to your local device.
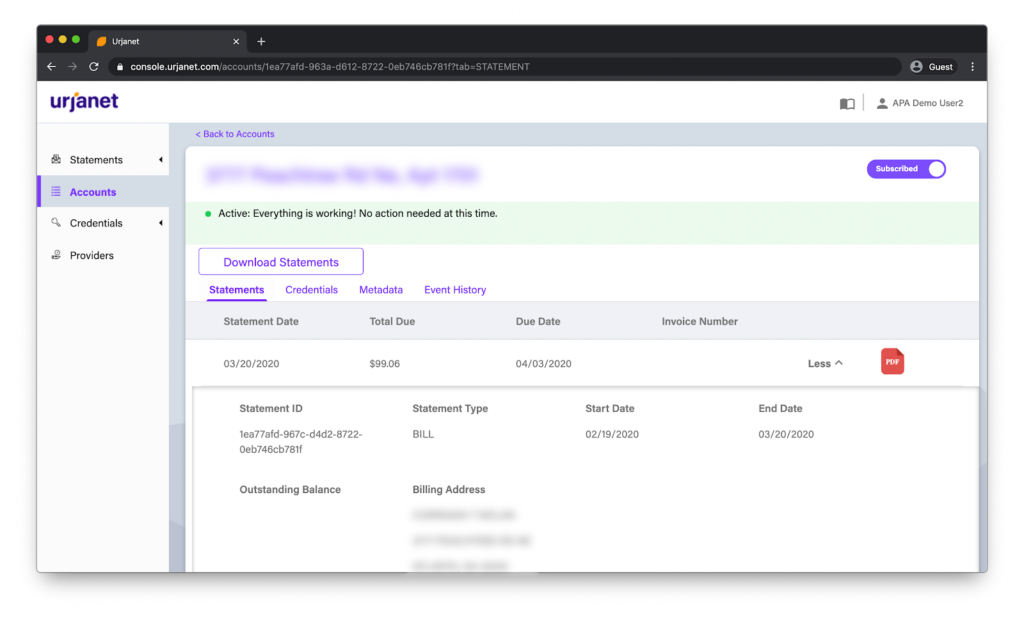
You can also subscribe/unsubscribe accounts using the toggle in the upper right-hand corner of the page.
Statements
On the Statements page, you can see a list of all the invoices in the system. Across the top of the page are quick filters that allow you to sort the statements.
- All Upcoming: This shows all the invoices whose due dates are today or in the future.
- High Priority: This shows all the invoices that will be due in the next 14 days.
- New: All statements that were extracted within 30 days
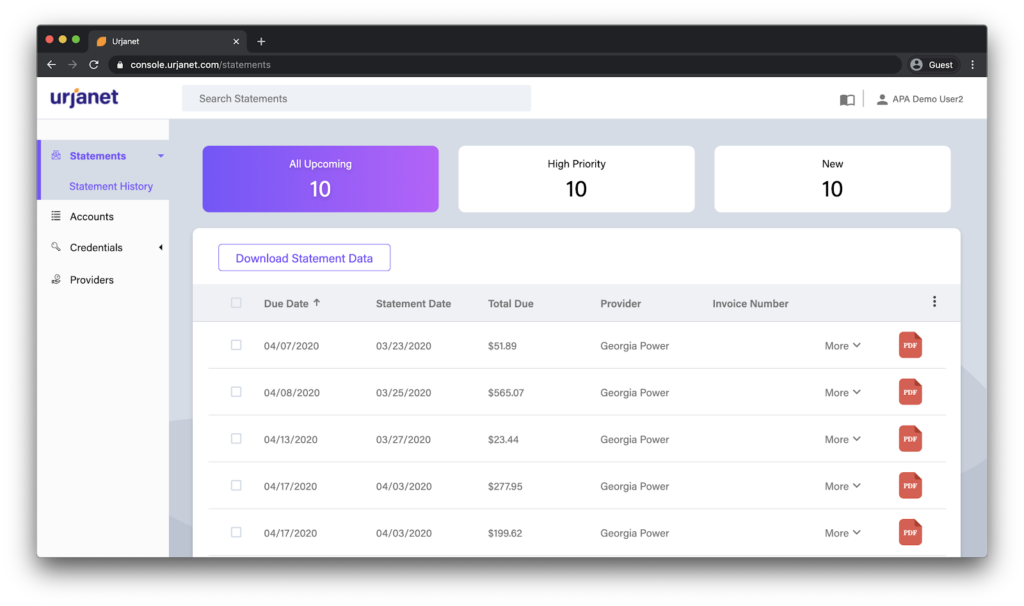
In the Statements module, you can view the data that Urjanet has parsed off of the utility invoice.
Note: Urjanet Console shows a subset of the data that is collected.
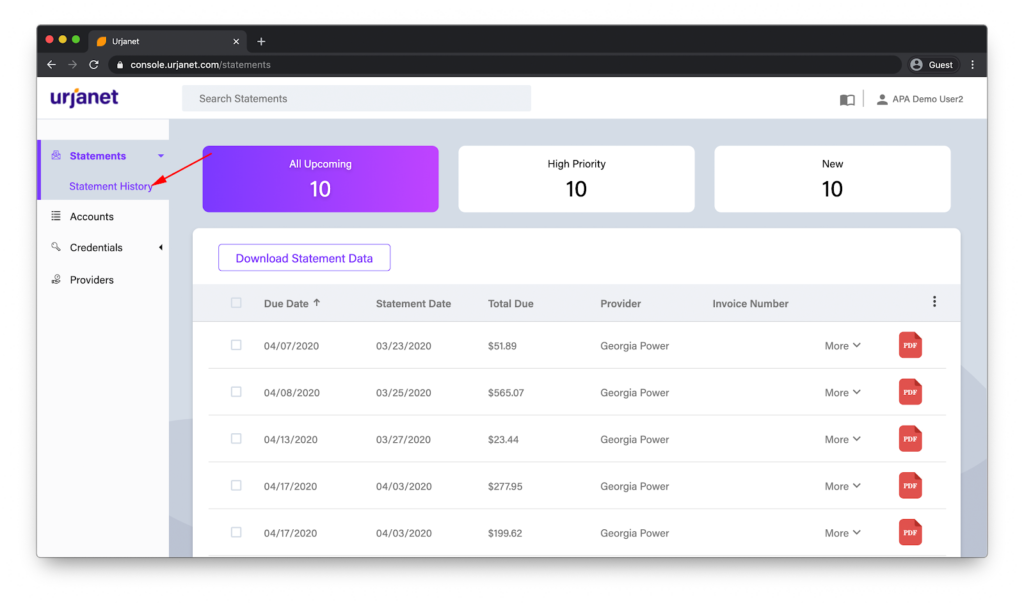
Statements will appear here after the Urjanet platform has extracted the utility invoice data and the due date has yet to pass. To view invoices with due dates in the past, click on “Statement History”
Next Steps
Congrats! You’ve now successfully submitted a data request and downloaded utility data. Continue exploring Docs to learn more.